

Tangled Up in Bobbles
November 23rd, 2009 | View Comments
So I have been knitting.
If by “knitting” you mean knitting and re-knitting the same section of sweater over and over again. I am now officially a working stiff (of the hellish-commuting/lots-of-overtime variety), which means on a good day I’ll get to sneak maybe 20 minutes of knitting before I pass out on the couch. Anything more complicated than stockinette is now completely beyond me.
I reached the yoke part of the Tangled Yoke Cardigan, attached the sleeves, and continued working merrily along in stockinette. Until I discovered that I’d missed the decreases on the row where I attached the sleeves. Frog. Re-knit.
Missed the first round of yoke decreases. Frog. Re-knit.
Got to the cable pattern and miscounted the number of stitches between the 5-in-1 increases. Frog. Re-knit.
Missed the second set of 5-in-1 increases. Frog. Re-knit. Re-knit wrong, frog and re-knit again. It’s still wrong, so I frog and re-knit again, this time successfully.
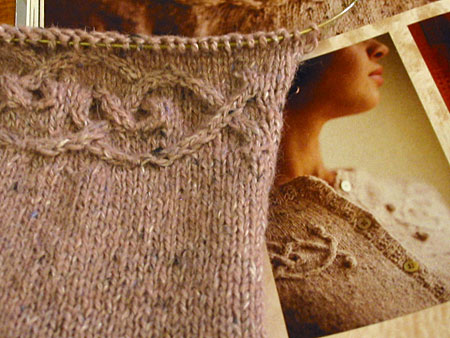
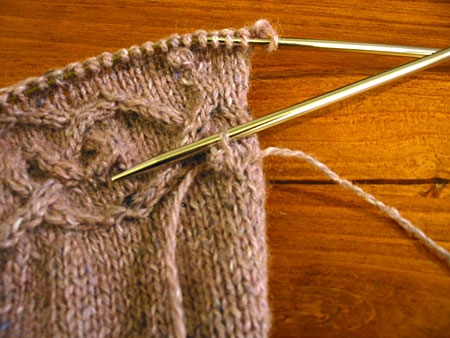
I finish the cable pattern, and the next round of yoke decreases, and feel all proud of myself that I finally finished the hard part and can go back to zoning out on stockinette.
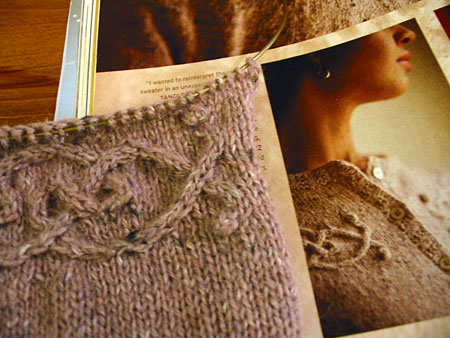
And then I looked more carefully. Check out the picture above again. Notice something?
Here’s a hint:
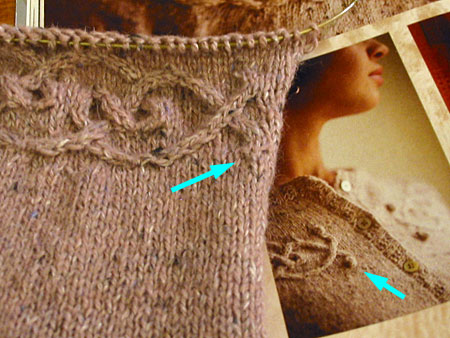
There were four dots on the chart that I thought were purl stitches. Turns out they were bobbles.
I debated just leaving it, but I know myself and it would forever bother me if I didn’t have the bobbles. But I also couldn’t bring myself to frog that section again. I did a quick Google search and fortunately turned up this MIA bobble tutorial that served as the basis for my repair.
Step 1: Using the same size needle, pick up the stitch that should have been bobbled, but wasn’t.
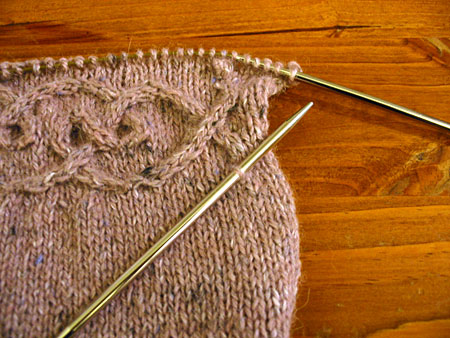
Step 2: Join yarn and knit into the front, back, and front of the stitch (a 3-in-1 increase) to start the bobble.
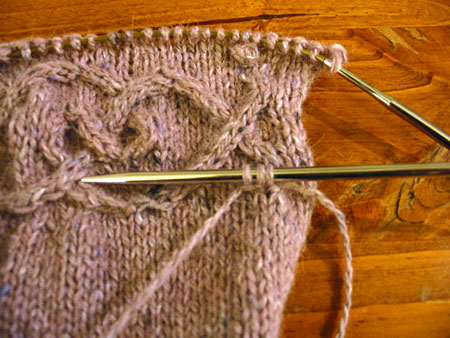
Step 3: Turn, p3, turn again, sl 1, k2tog, psso to finish off the bobble.
Step 4: Break yarn and pull the loop through. Sew the bobble down to the stitch above the one you picked up in Step 1. Weave in all ends.
Bobblicious. Onto the stockinette!
CogKnition posted this on November 23rd, 2009 @ 12:46am in Tutorials, Unfinished Objects | Permalink to "Tangled Up in Bobbles"


Oh, I feel your pain on the frog, reknit, frog, reknit merry go round!!
Nice bobble fix, though
Those few rows of the cable section took me over a month to knit, frog and reknit again and again. It didn’t help that I was knitting a larger size either.
I like the bobble fix though, very neat.